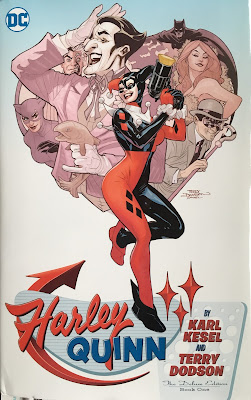
Here's the Harley Quinn Deluxe Book 1 Cover Art!
By Rachel Dodson and Me.
Out now from DC Comics.
FLATS
The first stage of color is called flats - flatting allows me to choose an area to color at any point throughout the coloring process.
I try to adjust the colors to their medium value or imprimatura - I use this as the starting point for the piece.
INITIAL COLOR (ROUGH IN)
I colored this on my Cintiq 22 HD using Photoshop CS3 .
Here I rough in quickly all the medium lights and darks on the figures and cast initial shadows.
I colored this on my Cintiq 22 HD using Photoshop CS3 .
Here I rough in quickly all the medium lights and darks on the figures and cast initial shadows.
Using the Pencil Tool at 100% to knock those in.
I also used the Gradient tool to give variation form warm red to cool red in Harley's costume.
ADDITIONAL ROUGH IN
I went on the rest of the figure and face and knocked the next lights and darks using the pencils tooling at 70-80%.
I go to the next level of darker darks and lighter lights
COLORING THE LINE ART
This is the icing on the cake step of the process.
I used a previous Harley I colored to "cheat" on the line colors since I already figured it out once...


No comments:
Post a Comment